Tuesday
Product Brandong


Final Fixings


I finaly arrived at my final fixings. It took a few lots of prototyping and a few times in the rapid prototyper but I finally hit the nail on the head. These mechanisms are slightly longer at one side than the other so that they can hook through the eyelet and then grip on once through the other sode. Then the course of gravity takes its toll and wil pull the hook downward into place securing it behind the eyelet and holding the pouch securely in place on the straps.

Nearing the finish line


The images above show the last few steps of the manufacturing process of the pouches. Joining the two parts together was quite tricky and time consuming and once the polypropylene pannel was in place inbetween the inner lining and the outer layer it was made 10 times more difficult as there was a rigid plastic pannel in place. The plastic pannel and outer layer had to have holes cut in them in order for the fixings to join onto the pouch. A working drawing of this mechanism will be put up later.
More sewing


The first image above is the finished botom half of the pouch. This is the outer pouch with the inner lining sewn in. I made the inner lining sligtly larger than the outer one so that I could fold it over the top of the outer layer creating a natural biast binding and a colourful seam when the pouch is opened.
I then started on the lids of the pouches. This was the most tricky part so far as it was so fidly. I had to sew both lining and outer together again and then turn it inside out. This got quite tricky and confusing as you have to make sure that the matrial will be the right way up when turned the inside out as most of the sweing was done inside out.
The making of the pouches


To start making my pouches I had to make paper patterns. These paper patterns were taken from my final CAD model which I will post up later. I then pinned them to the fabric and cut them out leaving and inch around the edge for seam allowance. To start sewing them together we pinned the right side to the right side of eah pannel so that when it is turned inside out the right side is showng. I then sewed the edges together and then sewed on the bottom pannel. This bottom pannel was quite tricky to sew on the smaller pouches as it was smaller and more fidly to work with but I soon got the hang of things after the 4th pouch lining. We started off by making the outer sleeve and the linings first as these were the easier parts to sew up.
Manufacturing continued ...


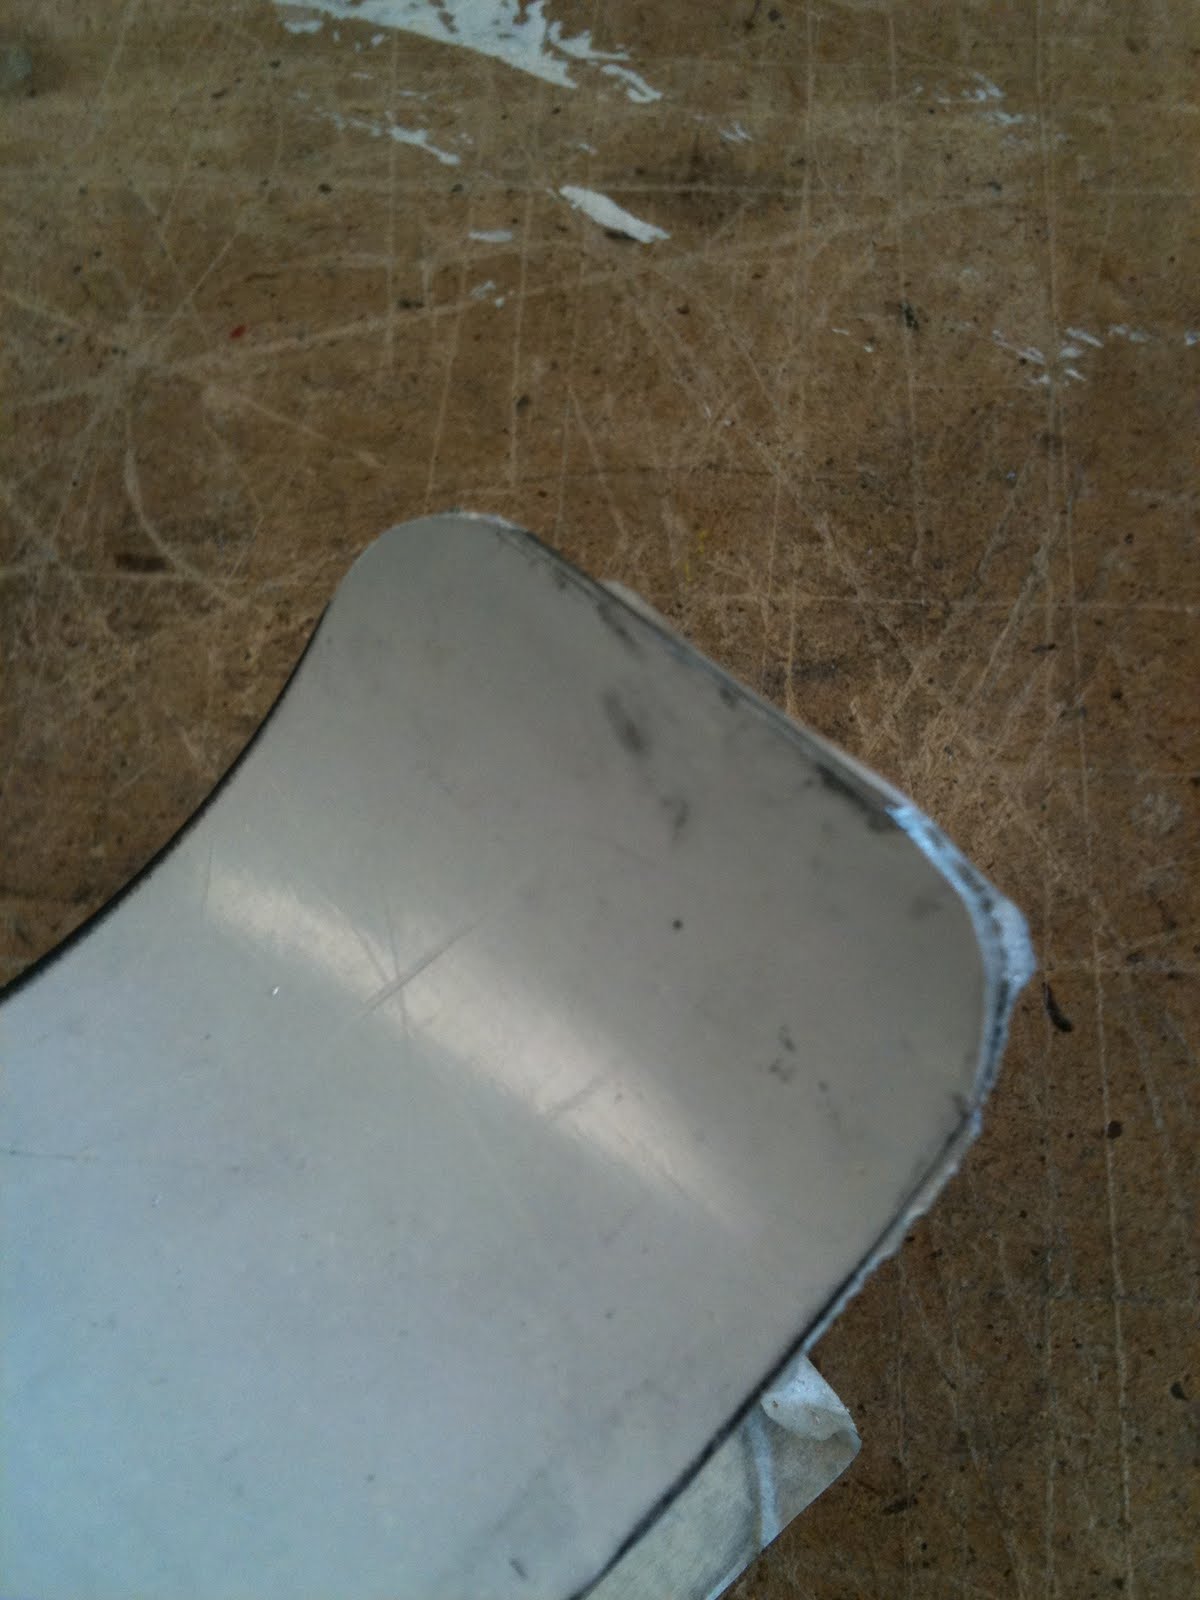


The images above show my process of bending the back pannel to form a curved shape which will grip onto the door. This curved form will also help with the removing of the hook from the door as it allows you to get a firmer hold of the hook having the curve in it and then you can simply push the hook up loosening the grip it has on the door allowing it to be taken off with ease.
Gripping technique

I feel that my hooks need some sort of solution to help them grip onto the door, but also watching so that it doesnt scratch the door in the process of taking it on and off. These drawing board clips which are used to clip sheets of paper to archiectural drawing boards gave me the perfect form of inspiration. By adding a curve into the back pannel of the hok would allow for the hook to have a natural flex and this would allow it to grip the door securely in place. Although in my finalhook the curve will be slightly larger for aesthetic purposes.
Making of the hooks continued


The manufacturing process continues with the beding of my aluminium into the desired shape for hanging over the top of the door. I started by marking on the masking tape which I've used to protect the polished surface of the aluminium from scratching. I then put it in to the metal folding machine aand started to bend the amuminium in to its finished form. This can be seen above.
Making of my final Product


This is me starting to makemy final hooks for ove the top of the door. I started by cutting my aluminium to size on the metal cutter and then cut out the form of each front pannel on the band saw and sanded it down so it wasnt sharp.
After I had he desired shape I wanted I moved on to polihing up the underside of the aluminium as the front side has a protective layer on it which means that only the underside would need worked. To do this I headed over to the 3D workshop to use the pollishers. This job was very messay as you had to use the polish with the mops in the polishing machines and the aluminum got quite hot after being polished.
Key Prototype Finding
From my prototyping phase made many findings with regards to my project. The first of these was made when I was prototyping my pouches. I found that the size and form of the bags was important to how much room they took up behind he door and if I was wanting to solve the problem of storage space I would have to apply the same principles. I also realised that it would be better to have some form of lid on the pouches in order to prevent the recyclable materials from smelling etc.
The second finding was that from my initial strap prototyping and fixings that I may need to include 2 haning points on the pouch instead of one as this not only will allow a more sturdier connection between the straps and the pouches but if it has 2 points of connection it also helps the pouch hold is form without needing to be stabalised or re-inforced in any way. So therefore my final concept will include 3 straps.
Also when prototyping the fixing mechanisms between the pouches and the straps I realised that you ned to have some element of mistakes made in order to find the one that is right. It was a very frustrating and long proces but I got there in the end wth the final design and form of the fixings.
All the colours of the rainbow

Here are some logos which I have designed to go along with my pouches. At the moment I am unsure as to whether I will use these on the final design or not. The colours of the logos match the colours of the fabric for the linins of the pouches. These colours represent the recyclable materials that are to go in to each of them. These colours are the same as the colours of current recycling facilities. For example orange for plastic and blue for paper and cardboard.
Final materials arrive


Today was a very exciting day indeed as the materials to make my final product arrived! And boy are they pretty! I'm getting more excited now every day about the degree show especially now that I can get started making the final thing!
Photoshoot 2


Here are some more images from my second photoshoot with Stuart. I feel that these images were better than the first set of images because they included some recyclable materials in the pouch and also it puts the pictures into perspective. I think I may use one of these images for my final board for the degree show.
Subscribe to:
Posts (Atom)
